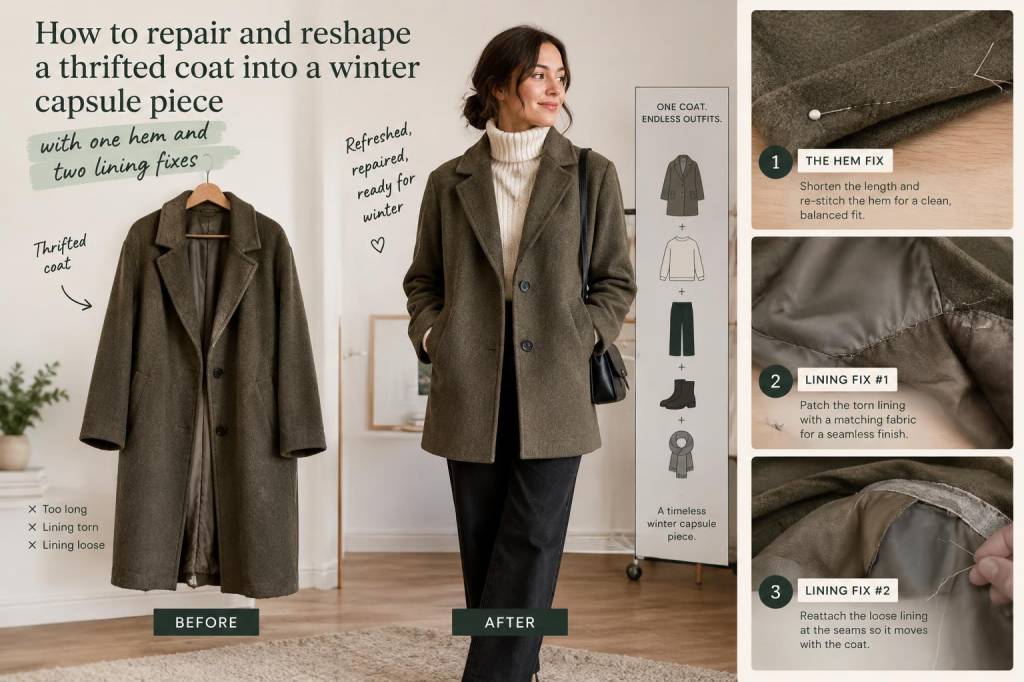
I found the coat at the back of a charity shop in a drizzle of late October — navy wool, classic lapels, a slightly boxy shape that felt like it had once belonged to someone who loved trains and strong coffee. It was the sort of thrifted treasure that needs a little attention to become a wardrobe workhorse. With one hem adjustment and two quick lining fixes, I turned it into a reliable winter capsule piece that gets regular wear. If you’ve ever stood in front of a coat rack wondering which repairs are worth the effort, this is for you.
Why I focus on one hem and two lining fixes
When I’m rescuing a thrifted coat, I aim for the smallest number of high-impact changes. Hemming can change the whole silhouette — making a coat look tailored instead of oversized — and the lining determines how the coat feels and functions: warmth, ease when putting it on over layers, and how it drapes. Two lining fixes that have saved me countless coats are: repairing or replacing the sleeve lining and fixing the body lining at the back seam or vents. Together with a well-measured hem, these three interventions give you a coat that looks intentional and fits into a capsule wardrobe.
What you’ll need
Step 1 — Assess and mark the hem
First, try the coat on over the clothes you’ll wear under it — a chunky knit, perhaps a blazer. Stand in front of a mirror and move around. For a capsule coat, I prefer a length that sits just above or at the knee for tights and boots, or mid-thigh for relaxed tailoring. Decide where you want the hem and mark it with tailor’s chalk. If the coat has a vent at the back, consider shortening evenly on both sides of the vent so it still sits correctly when you walk.
To pin: fold the excess fabric up, pin at regular intervals, and double-check mobility: sit, bend your arms, and walk a few steps. You should be able to cross your legs and swing your arms without pulling at the shoulders. If the coat is lined, leave the lining alone for now — we’ll address it in the lining repairs.
Step 2 — Hemming the outer shell
If you’re comfortable with a sewing machine, stitch the hem on the shell fabric first. I usually take the hem up by hand when dealing with wool to preserve the original edge; but for speed and a neat finish, a blind hem or straight stitch works well. Press the new hem with steam and consider a lightweight fusible interfacing for stability if the fabric is frayed or lightweight.
Step 3 — Sleeve lining fix
Sleeve linings often tear at the wrist or are worn where the hand exits. To repair:
A repaired sleeve lining instantly improves the way the coat slips on and off over knitwear. I like to use a slightly slippery polyester lining so jumpers don’t catch, and sometimes I sew a small bit of ribbon into the seam where my hand meets the cuff for extra longevity.
Step 4 — Body lining fix (back seam or vents)
There are two common problems: the lining has come loose at the back seam/vent, or the lining is ripped down the centre back. Both are fixable without replacing the whole lining.
Sometimes the lining is beyond a small repair. In that case, I replace the main panel behind the upper back only — just enough to stop the lining from pulling and to add a little insulation. You don’t need a full reline to improve wearability.
Styling notes — making it a capsule piece
Once the coat fits and moves properly, think capsule. I wear mine with:
Rotate an accessory or two and the coat serves multiple outfits: it’s my commuting coat, library coat, and the one I reach for on chilly weekends. For extra practicality, add a small inside pocket (hand-sewed) for bus passes or lip balm — an easy, functional upgrade.
Maintenance and small upgrades
These three straightforward interventions — a considered hem, a mended or replaced sleeve lining, and a fixed back/vent lining — turn a thrifted coat into an everyday favourite. You don’t need a full overhaul to make a coat wearable and beautiful; you just need to focus on how it fits, moves, and feels against your layers. Happy mending — and if you try this, I’d love to hear how your coat turns out.