I still remember the first time I snagged my favourite chunky knit — walking past a wrought-iron fence and feeling my stomach drop when I saw the long thread loop on the sleeve. I thought it was ruined. Over the years I’ve learned that most snags are repairable at home without pulling out a whole sewing kit, and often you can make the jumper look as good as new. Here’s how I approach a snagged jumper, step by step, with the little tricks I actually use when I don’t have time (or patience) for complicated mending.
Before you touch the snag: assess the fabric
Not all snags are the same. The best method depends on what your jumper is made of:
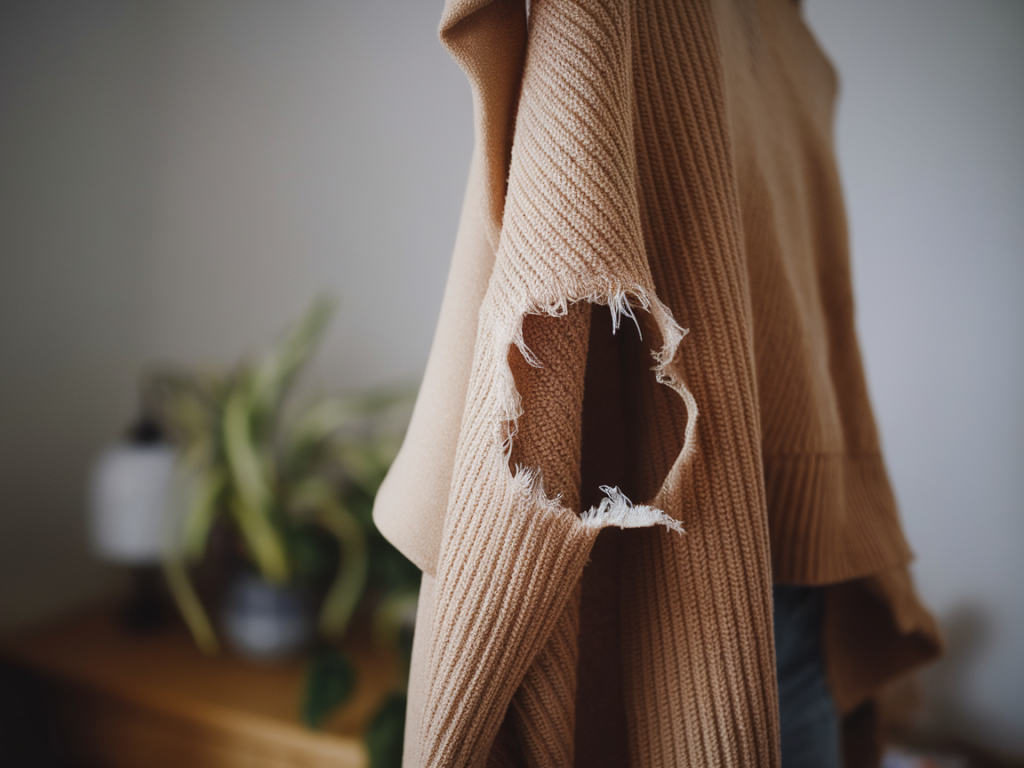
Wool and cashmere: Often stretch more and recover nicely if you’re gentle.Cotton and blends: Less elastic but usually respond well to smoothing and blocking.Synthetic knits (acrylic, polyester): Can be more fragile at the pull point; be careful with heat.Take a moment to feel the area around the snag. Is the thread looped (a visible loop sitting on the surface), or is the yarn actually broken? If it’s snapped, you’ll need a different approach than if it’s just pulled. I find that most snags are looped, which are usually the easiest to fix without sewing.
Tools you don’t need — and the few I do
You don’t need a full sewing kit. Here are the few things I keep in my mending drawer that are lifesavers:
Tweezers: For pulling the yarn back through to the inside or redistributing fibres.Crochet hook (size small): The gentlest way to pull a snag back through the fabric — a 0.75–2.0 mm hook works for most jumpers.Safety pin or small darning needle: Only if a crochet hook isn’t available.Clear nail polish or fabric glue: To secure a broken end (use sparingly).Steam iron or handheld steamer: For reshaping and evening out fibres after repair.If you don’t have a crochet hook, I’ve used an unfolded paperclip once in a pinch. It’s not ideal, but it works if you’re careful.
Method 1 — coax the loop back through (best for loops)
This is my go-to because it’s simple and non-invasive.
Turn the jumper inside out so you can access the back of the fabric. Work from the inside — if you pull the loop back through to the wrong side, it will be much less visible.Use a crochet hook or safety pin to gently hook the loop and pull it back through to the inside. If the loop is small, twist the hook slightly to get a secure grip.Once the loop is on the inside, distribute the tension: lay the jumper flat and gently pull on nearby areas of the knit to even out the yarn. Don’t yank — slow, light tugs help the stitch settle.Finish by steaming the area (steam iron on a low setting or a handheld steamer held a few centimetres away). The steam relaxes fibres and helps the stitch blend back into the knit.Method 2 — when the loop can’t be pulled through (surface loops)
Sometimes the loop is too large or the structure of the fabric makes it hard to pull through. In that case:
Use a pair of sharp scissors as a last resort: snip the very tip of the loop, not the whole yarn. The remaining yarn will retract into the fabric. This is a tiny risk because if the yarn is cut too short it can unravel — so go slowly.After snipping, smooth and steam the area as above to blend the loose end into the surrounding fibres.Method 3 — mending a broken yarn end
If the yarn has actually broken, I try to hide the end and secure it:
Tuck the broken end into the inside of the garment using tweezers or a darning needle. Push it through into a gap in the knit; the surrounding yarn should hold it in place.Apply a tiny dot of clear nail polish or fabric glue to the tucked end to stop fraying. Let it dry completely before wearing.If the break is in a high-stress area (elbow, cuff), consider reinforcing from the inside with a small patch of matching fabric or an iron-on mending patch cut to size. I avoid bulky patches — thin knit-friendly ones are best.How to disguise a slightly visible repair
If you can still see a faint repair, a few styling tricks save the day:
Layering: wear a cardigan, scarf or jacket over the area when possible.Embellish discreetly: a small brooch or a cuff detail can draw attention away from a tiny imperfection.Wear it with confidence — if you treat it like a design detail, others will too. I once added a subtle embroidered running stitch over a sleeve repair and loved how it looked.Preventative tips to avoid future snags
Prevention is the kindest thing you can do for a jumper. I follow a few simple rules:
Keep jewellery and zips away from delicate knits; the same goes for handbag hardware.Use a laundry bag for machine-washable knits and choose a gentle cycle. Better yet, handwash cashmere and delicate wool.Store jumpers folded rather than hanging, which stretches fibres and creates more opportunities for snags.Careful storage: cedar blocks or lavender sachets keep moths away — damaged fibres attract nastier problems than snags. | Problem | Quick fix |
| Surface loop | Pull through from inside with crochet hook; steam |
| Large loop | Trim tip carefully; steam and smooth |
| Broken yarn | Tuck end inside; secure with clear nail polish |
I find that a gentle, patient approach solves most issues. The first time I properly rescued a cashmere sweater it felt like a small victory — and now I treat those little imperfections as opportunities to learn. If you do decide to try a visible repair (a tiny embroidered accent or a decorative darn), it can turn a potential wardrobe casualty into something you love all over again.
One last practical note: if the jumper is expensive or has sentimental value and the snag is complicated, don’t hesitate to take it to a professional mender or a good dry cleaner. They have tools and experience for delicate fibres that I sometimes envy. But for everyday snags, these at-home steps will usually do the trick and save a favourite jumper from the bin.